Ink & Supplies, Printing Tips

Know All About Inkjet Printers

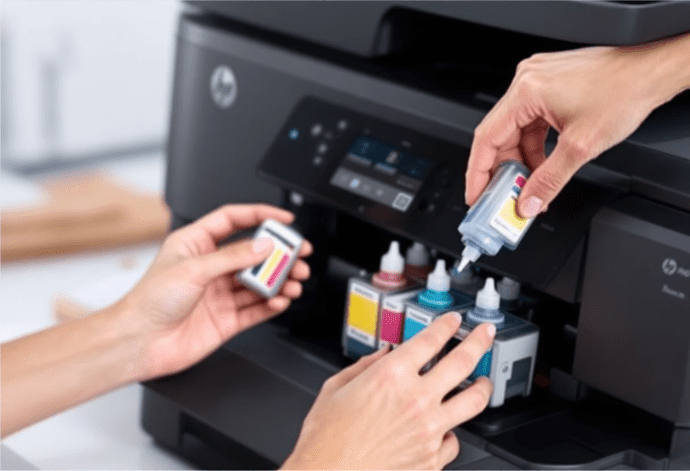
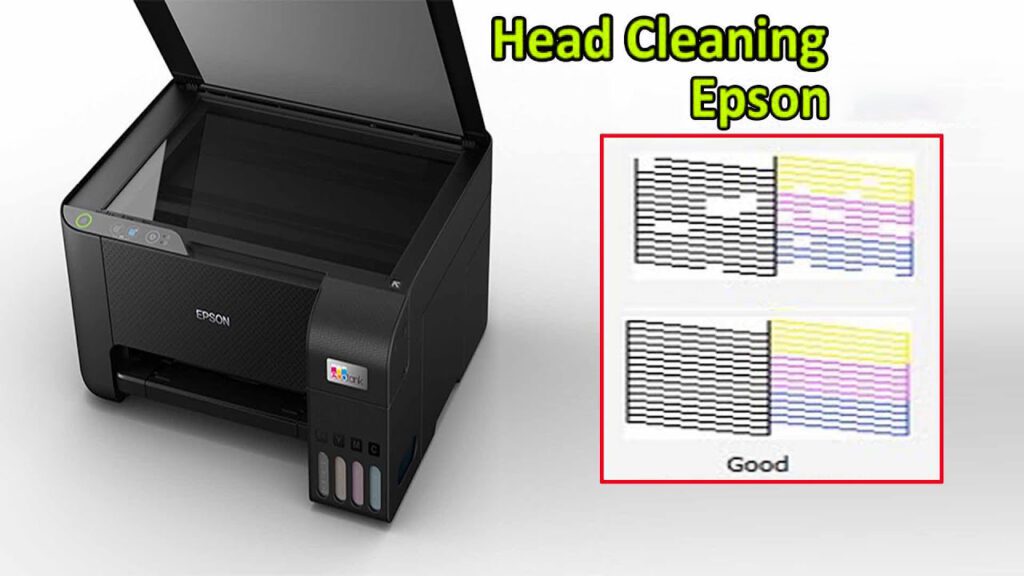
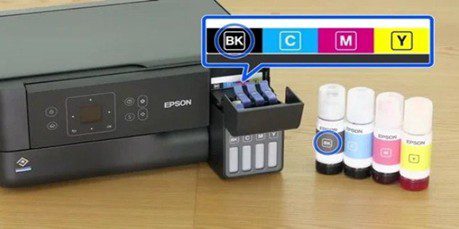
Know All About Inkjet Printers Inkjet printers have become a staple in homes, schools, and small offices due to their affordability, versatility, and ability to produce high-quality prints. Whether you need to print vibrant photos, clear documents, or even labels, inkjet printers are often the go-to choice for everyday printing tasks. In this article, we’ll explore what inkjet printers are, how they work, their key features, advantages, and ideal use cases. Inkjet Printers What Is an Inkjet Printer? An inkjet printer is a type of non-impact printer that sprays tiny droplets of ink directly onto paper to create an image or text. The technology relies on either thermal or piezoelectric mechanisms to eject the ink through nozzles with incredible precision. Inkjet printers are known for their fine resolution and the ability to blend colors smoothly, making them suitable for both text and photo printing. An inkjet printer How Inkjet Printers Work Inkjet printers create images and text by spraying tiny droplets of ink directly onto paper. These droplets are incredibly small some smaller than a human hair and are precisely placed to form sharp text and detailed images. The process is controlled by the printer’s printhead, which moves back and forth across the paper. How Inkjet Printers Work​ Key Features of Inkjet Printers High Print Quality: Excellent for producing detailed images and sharp text. Compact Design: Ideal for small spaces and home use. Color Printing: Most models offer full-color printing, often with multiple color cartridges. Photo Printing: Inkjet printers excel at printing photos on glossy or specialized paper. Affordable Upfront Cost: Generally cheaper to purchase compared to laser printers. Ideal Use Cases Inkjet printers are best suited for: Home Users who print occasionally Students needing to print reports or assignments Photographers who require high-resolution photo prints Small Offices with moderate color printing needs The Printing Process (Step-by-Step): Data sent to printer: A print command sends your file to the printer. Paper is pulled in: The paper feed roller moves a blank sheet into place. Print head starts moving: It moves across the paper line by line. Ink is sprayed: Controlled droplets are released as needed based on the image or text. Drying: The ink sets and dries, especially if printing photos or glossy materials. Paper exits: The finished print is ejected onto the output tray. Benefits of an Inkjet Printer Inkjet printers are a popular choice for home and office use due to their versatility, affordability, and high-quality output. Here are some key benefits: High-Quality Image PrintingInkjet printers excel at printing detailed and vibrant photos with smooth color gradients, making them ideal for photography and design projects. Affordable Initial CostInkjet printers are generally less expensive to purchase compared to laser printers, making them accessible for home users and small businesses. Compact and LightweightMost inkjet printers are compact in size, making them suitable for limited spaces and easy to move or reposition. Good for Low-Volume PrintingThey are cost-effective for users with light to moderate printing needs, especially in color. Ability to Print on Various MediaInkjet printers can handle a variety of paper types and sizes, including photo paper, labels, and even some fabrics.

epson-3210-printer- driver-downloader
Dedicated Brands, Epson, Fix & Troubleshoot

How to Download Epson L3210 Driver for Windows 11/10

How to Download Epson L3210 Driver for Windows 11/10 This article provides a clear walkthrough for downloading, installing, and updating the Epson L3210 driver on a Windows 10/11 Epson is recognized for producing high-quality printers worldwide. The L3210 is one of its cost-effective and trustworthy multifunction models. However, despite its excellent features, it may encounter printing issues if the appropriate or latest Epson L3210 driver isn’t installed. This driver functions as a vital interface that enables communication between your computer and the printer. The Epson EcoTank L3210 is a reliable all-in-one ink tank printer, ideal for home and small office use. To keep it functioning smoothly, you’ll need to install the correct Epson L3210 driver compatible with your Windows 11 or Windows 10 system. This guide will walk you through the safe and easy process of downloading and installing the Epson L3210 driver. Method : Epson L3210 Driver Download from the Official Website Visit the Official Epson Support Page Go to: https://www.epson.com      Or directly search on Google: “Epson L3210 driver download” go to: https://www.epson.com. Click on support tab Support Tab. Then Click on the home page and select printer form menu tab Select printer. Type your device model—for instance, Epson L3210—into the search bar and press Enter Select printer type. Then click on all in one printer select all-in-one printer. Select your printer select your printer. Choose Windows 11 or Windows 10, depending on your system choose window for your driver. Click on “Drivers & Downloads”=>Look for the section labeled “Printer Driver” or “Driver + Utilities Combo Package.” download driver. Download the Recommended Driver=>Click the Download button to begin the download process. Run the Installer=>Open the downloaded .exe file and follow the on-screen instructions to install the driver. Direct Download link Click on Epson 3210 Downloader Installing the Epson L3210 driver for Windows 11 or 10 is a simple task that ensures your printer runs reliably. Always download from official Epson sources to avoid outdated or harmful software. FAQs Q1. Why do we need to update driver for Epson L3210 printer? Driver updates for the Epson L3210 are key to maximizing efficiency and maintaining compatibility with your computer’s operating system. Q2. How can you best resolve driver-related problems for the Epson L3210 on Windows 10?? To fix Epson L3210 driver problems on Windows 10, the recommended approach is to get the latest version of the driver from Epson’s official support page.

how-to-install-printer-driver
Dedicated Brands, Fix & Troubleshoot, HP

HP Error Codes and How to Fix Them

HP Error Codes and How to Fix Them If you’re using an HP printer, you may occasionally run into error codes. These codes are designed to help identify what’s wrong but they can be confusing. In this guide, we’ll break down the most common HP error codes, what they mean, and how to fix them quickly and easily. Common HP Printer Error Codes 1. HP Printer Error Code 0x6100004a Cause: Mechanical jam or ink system failure How to Fix: Power off the printer and unplug it. Check for paper jams or obstructions inside. Open the cartridge access door. Remove the paper path cover Reinsert the ink cartridges. Plug back in and restart. 2. Hp Printer Error Code 0x83C0000A Cause: Firmware glitch or corrupted settings How to Fix: Perform a hard reset: unplug the printer, wait 60 seconds, plug it back. Update the printer firmware using HP Smart or the HP website. Reset the printer to factory defaults if needed. 3. Error Code 0x000003eb (During Installation) Cause: Driver installation failure on Windows How to Fix: Make sure your Windows operating system has all the latest updates installed.. Use HP Print and Scan Doctor to detect and fix driver issues. Remove outdated printer drivers and install the most recent version from HP’s official support page.. 4. Error Code 79 (Service Error) Cause: Printer firmware or network issue How to Fix: Take a moment to relax and step away from your printer—it’s okay. Once you’ve had a brief break, follow these simple steps to get back to printing quickly: Turn off and unplug your HP Laser Printer. On any connected computer, open the print queue and clear all pending print jobs. Power the printer back on. Attempt to print your documents again, but this time try using a different web browser than the one you initially used.

HP-printer-driver- installation-guide-for-Windows-10
Dedicated Brands, Fix & Troubleshoot, HP, Printing Tips, Setup & Support

How to Install HP Printer Driver in Windows 10 Step-by-Step Guide

How to Install HP Printer Driver in Windows 10 – Step-by-Step Guide If you’ve just bought a new HP printer or reinstalled Windows, you’ll need the correct printer driver to make it work properly. In this guide, we’ll walk you through how to install an HP printer driver on Windows 10, whether you’re installing it automatically or manually. What is a Printer Driver? A printer driver is a piece of software that allows your computer to communicate with the printer. Without it, your PC won’t be able to send print commands to the device correctly. Method 1: Download & Install from HP’s Official Website If Windows doesn’t automatically install the driver, or you want the latest full-feature driver, follow these steps: Step 1: Visit the HP Support Website Go to support.hp.com Step 2: Download the Driver for Windows 10 Select Windows 10 (64-bit) as your operating system. Download the HP Smart app or the Full Feature Software and Driver package. Step 3: Install the Driver Run the downloaded file. Follow the on-screen instructions to install the driver and connect your printer (via USB or Wi-Fi). Troubleshooting Tips Printer not detected? Try another USB port or cable. Wi-Fi issues? Restart your router and make sure both devices are on the same network. Driver conflicts? Uninstall any old HP drivers from Control Panel > Programs and Features. Related Question’s Q: Do I need to install the driver if I’m using HP Smart?A: No. HP Smart automatically installs the necessary drivers during setup. Q: Is the driver installation different for wireless printers?A: The steps are similar, but during setup you’ll choose Wi-Fi instead of USB. Conclusion It’s simple to get your HP printer working on Windows 10. You can connect it directly, grab the driver from HP’s website, or go through the HP Smart app, and be printing within minutes. Need help with a specific HP printer model? Drop your model number and I’ll tailor the instructions!

win-ss-duplex-print-menu-layout-tab
Dedicated Brands, HP, Printing Tips, Setup & Support

How to Print on Both Sides of the Paper in HP LaserJet M1005

How to Print on Both Sides of the Paper in HP LaserJet M1005 The HP LaserJet M1005 MFP does not support automatic duplex printing (printing on both sides of the paper automatically). However, you can still print on both sides manually by following these simple steps: Manual Duplex Printing on Windows Open Your Document Open the file you want to print. Open the Print Dialog Press Ctrl + P or go to File > Print. Select Your Printer Choose HP LaserJet M1005 from the list of available printers. Enable Manual Duplex Printing Click Printer Properties or Preferences (depending on the application). Look for an option like Print on Both Sides or Manual Duplex. If available, check the box and click OK. Print the First Side Click Print. The printer will print only one side of the pages. Reinsert the Paper Once the first side is printed: Take the printed pages. Flip them over and place them back into the paper tray. The orientation depends on your printer, so test with a sample page first (usually face-up with the top edge going into the printer). Print the Second Side If the app supports it, print only the second half of the pages (e.g., even-numbered pages). Key Reminders: Printer Software:Ensure that the appropriate driver for your HP LaserJet M1005 is correctly installed. Using the official or most up-to-date driver helps prevent compatibility issues. Operating System Differences:The procedure to access print settings may vary slightly based on your operating system (such as Windows or macOS). Refer to OS-specific instructions if needed. Manual Two-Sided Printing:If your device supports manual double-sided printing, follow the provided guidelines for taking out, flipping, and reloading the paper into the tray. Duplex Unit:Some HP LaserJet models, including the M1005 MFP, may support an optional duplex module. If installed, make sure it’s enabled in the printer’s configuration settings.

setting-up-the-printer
Dedicated Brands, Fix & Troubleshoot, HP, Setup & Support

Setting Up Your HP Smart Tank 580 Printer on Windows 11

This comprehensive guide walks you through the complete setup process for your new HP Smart Tank 580 All-in-One Printer on a Windows 11 system. Follow these detailed instructions to unbox, physically set up, install print heads, fill ink tanks, connect to your wireless network, and troubleshoot any potential issues. What’s in the Box Before beginning the setup process, verify that your HP Smart Tank 580 package contains all the necessary components. A complete package should include the following items: Main Components The HP Smart Tank 580 All-in-One Printer unit and power cable with the appropriate regional power adapter for your location. Print Supplies Black and tricolor print heads along with initial ink bottles specifically designed for the setup process. Documentation Setup documentation including a quick start guide, regulatory information, and warranty details. Optional Media Installation CD (though this is optional as drivers can also be downloaded directly from the HP website). If any items are missing from your package, contact HP Customer Support immediately before proceeding with the setup process. Having all components ready before you begin will ensure a smooth installation experience. Physical Setup and Unboxing Begin by carefully removing your HP Smart Tank 580 printer from its packaging. The printer is protected by various materials to prevent damage during shipping, so take your time with this step to avoid any potential issues. First, remove the outer cardboard box by cutting any sealing tape and lifting the top. Next, carefully remove the printer from the box, supporting it from the bottom. The printer will be housed in protective plastic and foam inserts. Once removed from the box, thoroughly inspect the printer and remove all external tape, protective films, and packaging materials. Pay special attention to orange tabs and strips, which indicate areas where packaging must be removed. Check inside the printer’s paper tray, scanner lid, and output areas for additional packaging materials. Placement & Power 1.Select a flat, stable surface with adequate ventilation. 2.Allow at least 5 inches of clearance on all sides. 3.Connect the power cable to the back of the printer. 4.Plug the other end into a power outlet. 5.Press the power button (typically marked with the power symbol). After powering on the printer, the LCD display will activate and show setup icons, indicating that initial installation is required. The printer will go through a brief initialization process, preparing it for the next steps. Do not proceed to print head installation until this initialization is complete. Print Head Installation Installing the print heads correctly is a critical step in setting up your HP Smart Tank 580 printer. Print heads are the components that spray ink onto the paper, so proper installation ensures optimal print quality and longevity. Prepare Print Heads Carefully unpack both the black and tricolor print heads from their packaging. Remove all orange protective seals and plastic covers from both print heads. Be careful not to touch the electrical contacts or ink nozzles. Open Printer Access Open the printer cover to allow the print carriage to move to the center position. This should happen automatically, but if the carriage doesn’t move, close the cover for 15 seconds and then reopen it. Prepare Print Heads Carefully unpack both the black and tricolor print heads from their packaging. Remove all orange protective seals and plastic covers from both print heads. Be careful not to touch the electrical contacts or ink nozzles. Install Black Print Head Identify the slot for the black print head (usually marked with a black symbol). Insert the black print head into its designated slot and press firmly until you hear a distinct click, indicating it’s securely seated. Install Tricolor Print Head Identify the slot for the tricolor print head (usually marked with a color symbol). Insert the tricolor print head into its designated slot and press firmly until you hear a distinct click. After installing both print heads, carefully close the printer cover. The printer may make some noises as it recognizes the newly installed print heads. Do not open the cover during this process as it may interfere with proper initialization. The printer’s display should indicate when it’s ready for the next step of the setup process. Filling Ink Tanks The HP Smart Tank 580 uses a refillable ink tank system instead of traditional cartridges. This design allows for higher capacity and lower cost per page. Properly filling these tanks is essential for optimal printer performance. Begin by locating the ink tank compartment, typically found on the right side of the printer. The ink tank area will have four separate tanks corresponding to black, cyan, magenta, and yellow inks. Each tank is color-coded and labeled for easy identification. Before opening any ink bottles, wash your hands thoroughly and prepare your workspace. Consider placing newspaper or protective material beneath the printer in case of spills. While HP’s bottle design minimizes mess, accidents can still happen. Filling Procedure: 1.Open all ink tank lids by lifting the transparent covers. 2.Unpack ink bottles, removing foil seals without touching ink. 3.Twist open the bottle cap and remove seal. 4.Align bottle nozzle with the tank and insert firmly. 5.Allow ink to flow naturally until the tank is full. 6.Properly dispose of empty bottles or reseal partially used ones. After filling all tanks, securely close each tank lid and the main ink compartment cover. The printer will automatically detect the ink levels and begin a preparation process that takes approximately 5-8 minutes. During this time, the printer may make various sounds as it primes the ink system. Do not interrupt this process or turn off the printer, as it’s essential for proper ink flow to the print heads. Downloading HP Smart App on Windows 11 The HP Smart app is an essential tool for managing your printer’s functionality, monitoring ink levels, scanning documents, printing from various sources, and troubleshooting issues. For Windows 11 users, installing this app through the Microsoft Store ensures you get the latest version optimized for your operating system. Access the Microsoft Store Click the

How-to-Change-Your- Preferences
Brother, Dedicated Brands, Fix & Troubleshoot, Printing Tips, Setup & Support

Printer Settings Made Easy: How to Change Your Preferences

Printer Settings Made Easy: How to Change Your Preferences Open Control Panel Click the Start menu and type Control Panel. Press Enter. Go to Devices and Printers In the Control Panel, click Devices and Printers or View devices and printers. devices and printers Select Your Printer Right-click on your preferred printer and select Printing preferences from the menu. printing preferences Adjust Your Settings A window will open where you can change settings like: Paper size and type Print quality (Draft, Normal, Best) Orientation (Portrait or Landscape) Color or Black & White printing Duplex (double-sided) printing adjust settings “Choose a printer in the Print window, then hit ‘Preferences.’ If you don’t see it, the app you’re using might have a different print setup.” printers & scanners print preference Click Apply and OK After making your changes, click Apply, then OK to save your preferences. Check your printer manual or manufacturer’s software for additional options and advanced settings and some applications (like Adobe Acrobat or Microsoft Word) allow print settings to be changed within the app before printing.

how-to-add-printer
Fix & Troubleshoot, Printing Tips

How to Add a Printer: A Complete Step-by-Step Guide

How to Add a Printer: A Complete Step-by-Step Guide Connecting a printer to your computer is an easy task that enables you to print files, images, and more. Use the steps below to begin, whether you’re using USB, Wi-Fi, or a network connection. Adding a printer enables your device to produce paper copies of digital content like reports, graphics, and photos. Whether you’re installing a brand-new printer or reconnecting a previously used one, the setup process is typically simple. This guide will walk you through how to add a printer on Windows. What You’ll Need: A functioning printer (turned on) A USB cable (for wired setup) or Wi-Fi access (for wireless setup) A computer (Windows or Mac) 1. Open Settings Go to Start > Settings > Devices > Printers & Scanners. 2. Click “Add a printer or scanner” Windows will search for nearby printers. printers & scanners 3. Select your printer Choose your printer from the list and click “Add device.” 4. Install drivers if prompted Windows may automatically install the driver or ask you to download it. Conclusion Adding a printer is a quick process once you know where to look. Whether you’re printing at home, in the office, or remotely, following these steps will get your printer connected and ready to go. Keep your printer drivers updated and perform regular maintenance to avoid connectivity issues in the future.

printer-is-not-printing?-what-you-need-to-know
Fix & Troubleshoot, Printing Tips

Printer is Not Printing? Here’s What You Need to Know

Printer is Not Printing? Here’s What You Need to Know It’s a familiar frustration: you hit the print button, but nothing happens. No error message, no paper movement—just silence. If your printer is not printing, you’re not alone. This is one of the most common printer issues faced by users at home and in the office. Fortunately, in most cases, the problem is fixable with a few simple steps. Use this comprehensive guide to learn the reasons behind your printer not printing and the steps to troubleshoot it Common Reasons Why a Printer Isn’t Printing There are multiple reasons why your printer might not be working—ranging from minor software issues to serious hardware failures. Here are the usual suspects Printer is OfflineYour printer may be set to offline mode, making it unresponsive to print jobs. Low or Empty Ink/TonerEven if the ink isn’t completely empty, some printers will stop printing when levels are too low. Paper JamA jammed sheet may be stuck inside without triggering an alert, halting all output. Outdated or Corrupt DriversPrinter drivers that are outdated or improperly installed can interfere with print jobs. Connectivity IssuesWhether USB or wireless, a loose cable or poor Wi-Fi connection can block communication. Queued Print JobsA stuck or paused job in the print queue can stop new documents from printing. How to Fix a Printer That Won’t Print Follow these steps to troubleshoot the issue: 1. Check Printer Connection Ensure the printer is powered on and all cables are properly connected. If it’s a wireless printer, make sure it’s connected to the same Wi-Fi network as your computer. 2. Set as Default Printer Go to Settings > Devices > Printers & Scanners and make sure your printer is set as the default. Set as Default Printer 3. Clear the Print Queue Open the print queue window, cancel all jobs, and try printing a fresh document 4. Restart Devices Turn off your printer and computer. Wait 30 seconds, then restart both. 5. Check for Paper Jams or Low Ink Open the printer lid and check for any stuck paper. Make sure ink or toner cartridges are full and correctly installed. 6. Update or Reinstall Drivers Visit your printer manufacturer’s website and download the latest drivers. Uninstall the printer from your system and reinstall it for a fresh setup. 7. Run Windows Troubleshooter On Windows, go to Settings > Update & Security > Troubleshoot, then select Printer. Pro Tip: Always keep your firmware and drivers updated and perform routine maintenance, such as nozzle checks and head cleaning, especially if you print infrequently Final Thoughts A printer is not printing can be a simple issue or a sign of something more technical—but in most cases, you don’t need a technician. By systematically checking your connections, settings, and supplies, you can often get your printer back in action in minutes. If none of the solutions work, it may be time to contact support or consider a hardware replacement. But in most cases, a little troubleshooting goes a long way.

how-to-clean-printer-head-epson
Epson, Fix & Troubleshoot, Printing Tips

How to Clean Printer Head Epson

Printer is Not Printing? Here’s What You Need to Know Over time, your Epson printer may produce faded or missing prints. This usually indicates a clogged or dirty print head. Follow these steps to clean it and restore print quality. Over time, your Epson printer may begin to show signs of faded, streaky, or missing colors in your prints. This usually means the printer head is clogged or dirty. Cleaning the printer head is a simple maintenance task that can restore print quality. Here’s how to do it—step by step. Step 1- Open the Browser and press Ctrl+shift+P Open the Browser and press Ctrl+shift+P Step 2-Select your printer then click on preferences button. Select your printer then click on preferences button. Step 3-Printeing process will open and click on maintenance option. Printeing process will open and click on maintenance option. Step 4- Printing process option will open then click on ‘Print Head Cleaning’. Printing process option will open then click on ‘Print Head Cleaning’. Step 5- The cleaning head dialog box is open. Click the Start button to proceed. The cleaning head dialog box is open. Click the Start button to proceed. The print head cleaning process is finished. Run a nozzle check to confirm print quality. If issues persist, repeat the cleaning or replace the ink cartridges. You can check and clean the print head by using the printer’s control panel and another more option. Insert A4 paper into the printer.             2. Press the button to turn on the printer.             1. Turn the printer on while holding the  button down, and then release the buttons when the power light flashes. The nozzle check pattern is printed. Below are nozzle check patterns: Good sample Print head needs to be cleaned In case the nozzle check isn’t clear, you might need to clean the print head once more and print the pattern again. Tips to Prevent Print head Clogs Print regularly to keep ink flowing. Always power off the printer using the power button. Use genuine or high-quality ink cartridges. Keep the printer in a clean, dust-free area.

Scroll to Top