Printer is Not Printing? Here’s What You Need to Know
Over time, your Epson printer may produce faded or missing prints. This usually indicates a clogged or dirty print head. Follow these steps to clean it and restore print quality.
Over time, your Epson printer may begin to show signs of faded, streaky, or missing colors in your prints. This usually means the printer head is clogged or dirty. Cleaning the printer head is a simple maintenance task that can restore print quality. Here’s how to do it—step by step.
Step 1- Open the Browser and press Ctrl+shift+P
Open the Browser and press Ctrl+shift+P
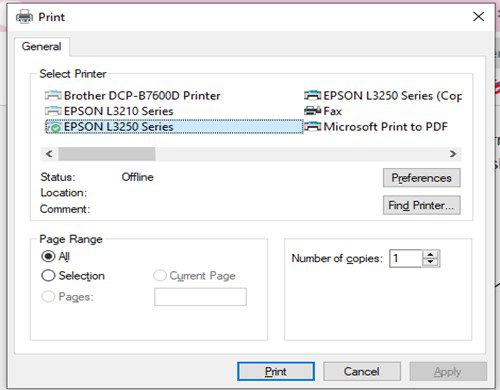
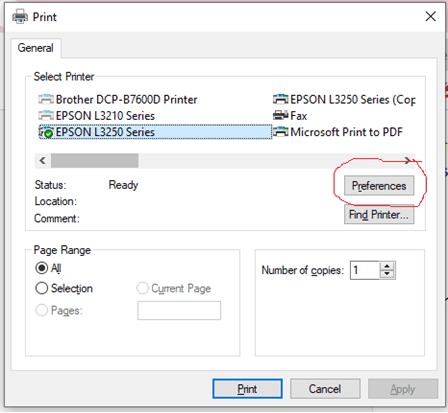
Step 2-Select your printer then click on preferences button.
Select your printer then click on preferences button.
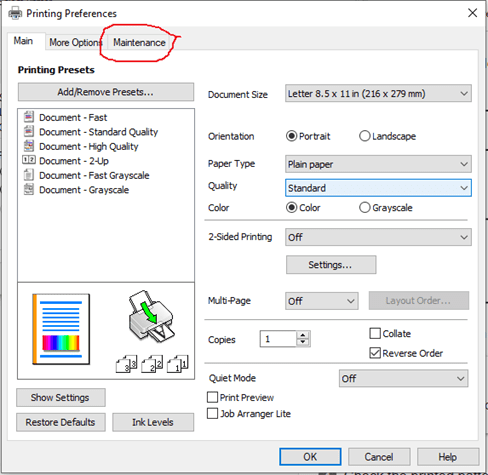
Step 3-Printeing process will open and click on maintenance option.
Printeing process will open and click on maintenance option.
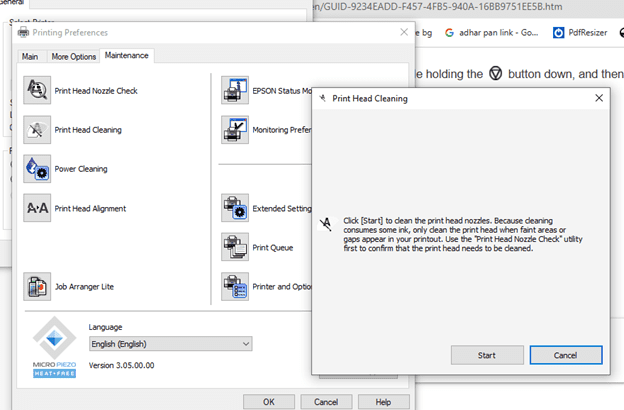
Step 4- Printing process option will open then click on ‘Print Head Cleaning’.
Printing process option will open then click on ‘Print Head Cleaning’.
Step 5- The cleaning head dialog box is open. Click the Start button to proceed.
The cleaning head dialog box is open. Click the Start button to proceed.
The print head cleaning process is finished. Run a nozzle check to confirm print quality. If issues persist, repeat the cleaning or replace the ink cartridges.
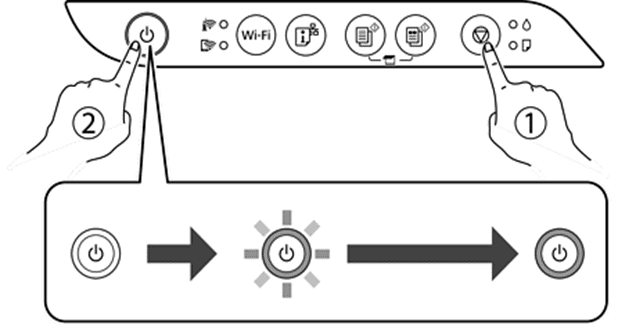
You can check and clean the print head by using the printer’s control panel and another more option.
Insert A4 paper into the printer.
2. Press the button to turn on the printer.
1. Turn the printer on while holding the button down, and then release the buttons when the power light flashes.
The nozzle check pattern is printed.
Below are nozzle check patterns:
Good sample
Print head needs to be cleaned
In case the nozzle check isn’t clear, you might need to clean the print head once more and print the pattern again.
Tips to Prevent Print head Clogs
Print regularly to keep ink flowing.
Always power off the printer using the power button.